DIY Drawer Organizer
I think in that location's something almost Bound Fever that gets in all of us, to some degree, and eats abroad at united states until we clean and organize something. The bug striking me final week, when I went to open up the drawers in my kids' bath vanity to be assaulted with hair elastics stuck in toothpaste chunks and ill-fitting bins all awry with odds and ends. It was and then I needed to organize this little function of my life, at least.
 View in gallery
  View in gallery
 In my defense, I'd put out a half-hearted attempt at organizing with these plastic bins. But the problem was, they didn't fit well in the drawers, so they were either sliding around or completely tipped over. I needed something custom, that actually fit in these drawers and stayed put. If you tin can relate to this tale of woe, and if you've got just a few minutes to spend on your own bathroom drawer cleansing, you won't be sorry. Trust me.
 View in gallery
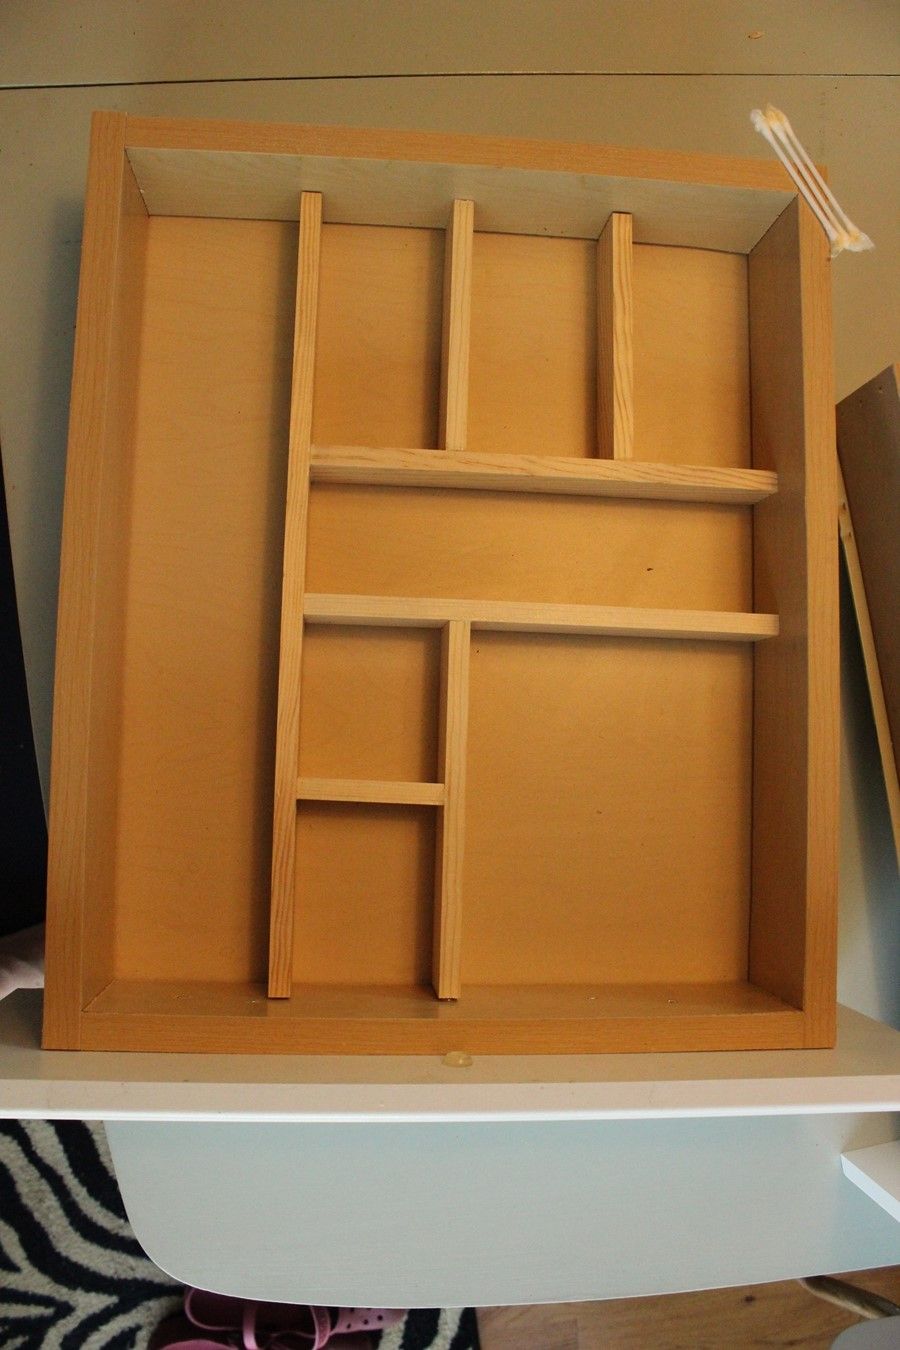
 Turn this…
 View in gallery
 …into this!
DIY Level: Beginner
Materials Needed:
- Arts and crafts board (width depends upon the top of your drawer infinite; length depends upon the size of your drawer confront and the number of slots yous want. Example uses three ii" x 36" pieces for two drawers.)
- Wood glue
- Measuring tape & saw
 View in gallery
 Roughly map out your dream drawer blueprint. This can (and volition likely) change as you're going, but it'southward helpful to figure out the basic layout of your drawers. Take note of what items you desire to organize and their respective sizes/shapes. I will exist showing designs for organizing oral fissure care and girls' hair basics.
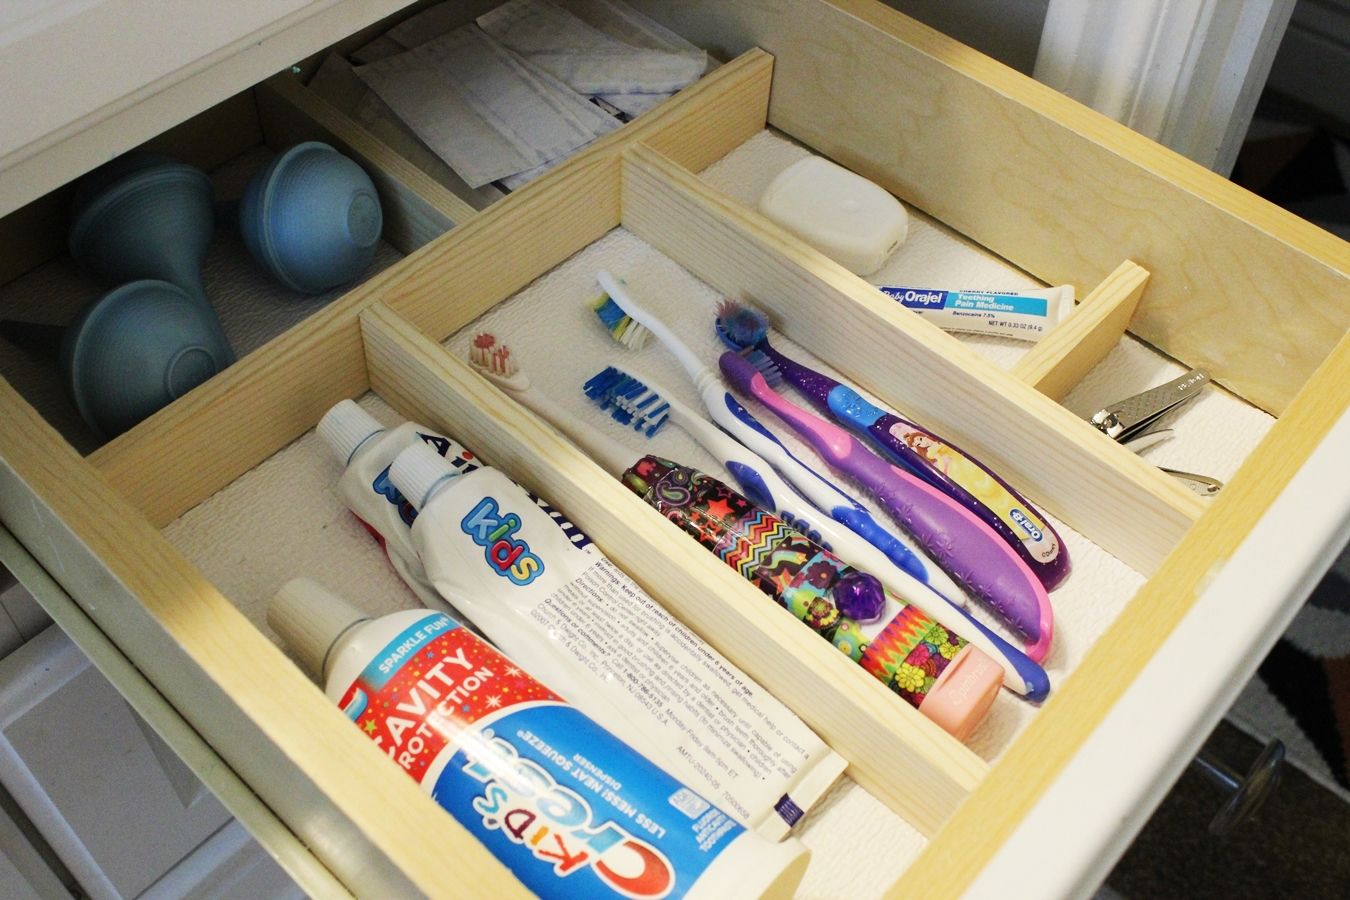
Drawer Design #1: Rima oris Care.
 View in gallery
 Cut your start board. Choose a single piece that volition span the length (or depth) of your drawer, and use this as your foundation to "build" off of. Simply set it into the drawer for now. Tip: I used a miter saw for fast and easy cutting. You could hand-saw these if you lot don't have access to a like chopsaw, and although that volition add to the fourth dimension of your project, it'll still become the job done.
 View in gallery
 Measure and cut your next piece. Because I was planning on organizing toothbrushes and toothpaste in the front one-half of this drawer, I measured the depth for those specific objects next.
 View in gallery
 Work slice by piece in your design. I found it easiest and well-nigh effective to work from the longest pieces to the shortest in my layout, cutting the chief pieces first before moving on to the smaller ones.
 View in gallery
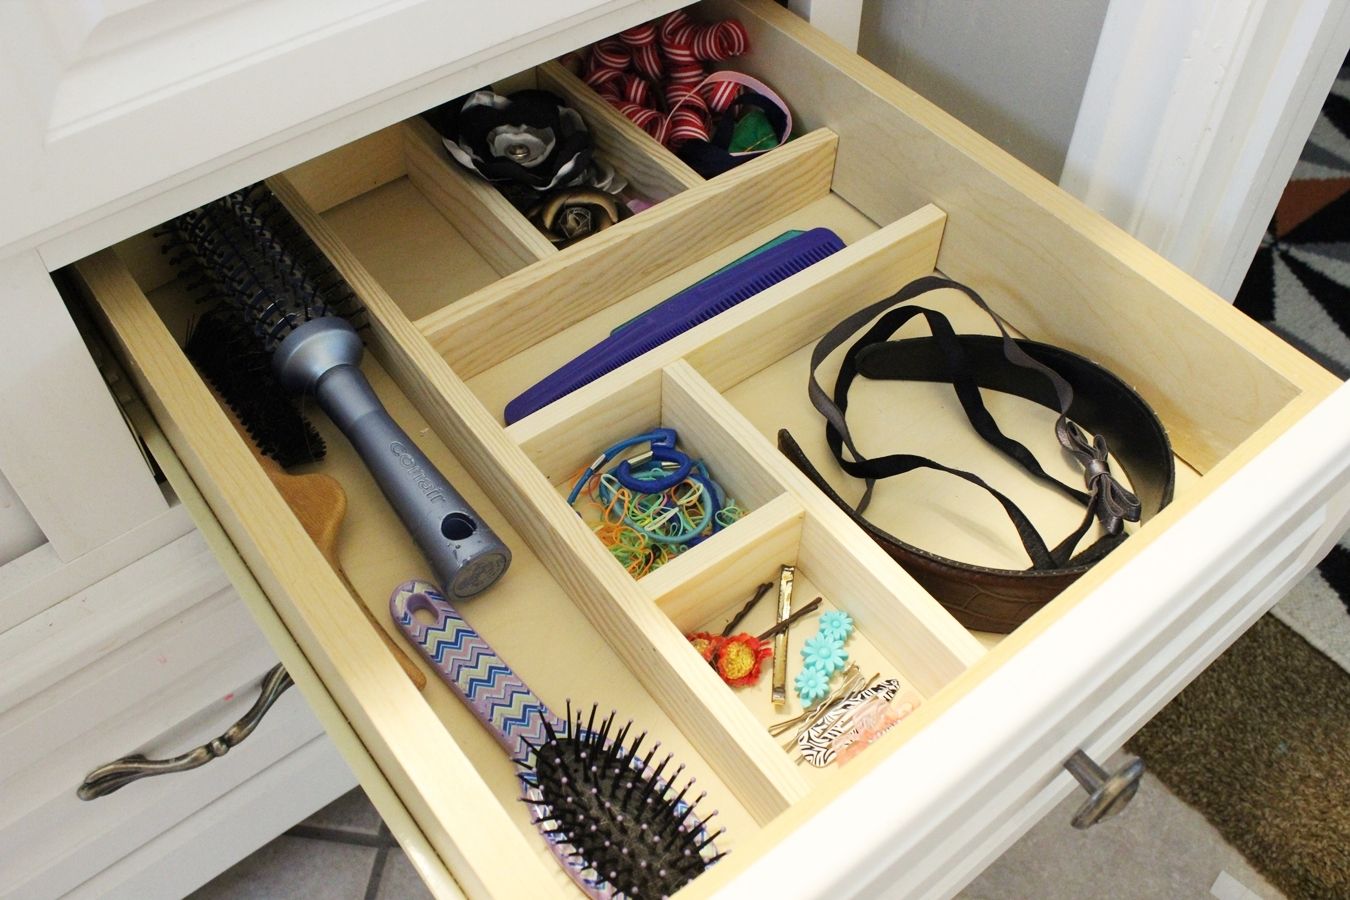
 Drawer Blueprint #2: Girls' Hair Basics.
Cutting the outset lath. In this instance, the commencement board spans the drawer from front to back, so that's my starting spot.
 View in gallery
 After the primary slot has been designated, the second main piece travels perpendicular.
 View in gallery
 Continue measuring and cutting boards. Following the scheme shown above (once more, working from largest/almost important slots to the more than flexible ones), soft-fit the pieces into your drawer. They should be able to stand on their own without existence also tight.
 View in gallery
 Glue pieces together. Channel your inner jigsaw puzzler and begin gluing your pieces together. Tip: Lay down a piece of wax newspaper in the bottom of your drawer as yous do this, to ensure that the organizer won't stick to the drawer itself and that you can remove it later equally you want/need.
 View in gallery
 It is recommended that y'all use enough gum that a small bit squeezes out when you mucilage the pieces together.
 View in gallery
 To keep things clean, though, use a q-tip to carefully polish out the drips and backlog.
 View in gallery
 Let it dry. This might be the hardest office of the project, but you lot'll want to follow the directions on your wood gum bottle for drying time to make sure it dries completely.
 View in gallery
 When it'due south dry, you're done! Doesn't this sight make the organizer inside just most burst with joy?
 View in gallery
 Fill in the drawers. Of course, y'all could go all color-coordinated with your appurtenances and all, to really make your eye sing. Because information technology'southward difficult to coordinate beloved kid toothbrushes and toothpaste, I merely went with simple, non-coordinated organization. It'south not as pretty, of course, but it'll do.
 View in gallery
 One of my favorite aspects near this DIY project is the fact that I can now fit and then much more into these drawers, and that my kids tin hands detect what they're looking for (and – gasp! – put it away when they're washed), and that I can pop out the organizers and redo them at whatsoever fourth dimension when our needs change. Okay, so that's three favorite aspects. I can't help it.
Source: https://www.homedit.com/diy-drawer-organizer/
0 Response to "DIY Drawer Organizer"
Postar um comentário